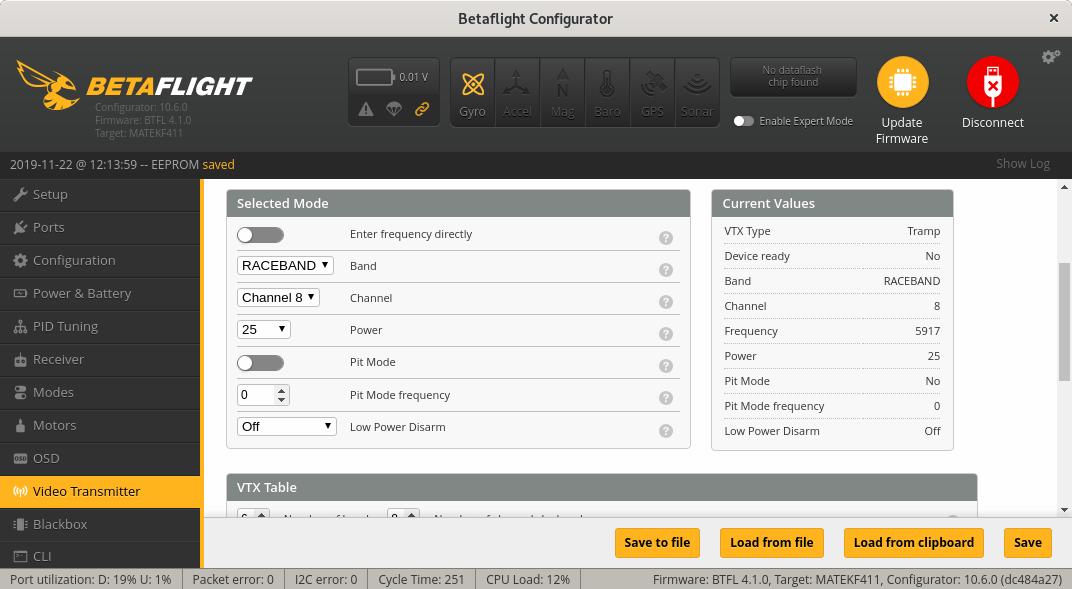
For those who are flying Quad, must be familiar with the term ‘VTX Table’, VTX table is actually a set of script that used by betaflight to set VTX’s parameters such as Bands, Channels/Frequencies, VTX Power Levels, etc

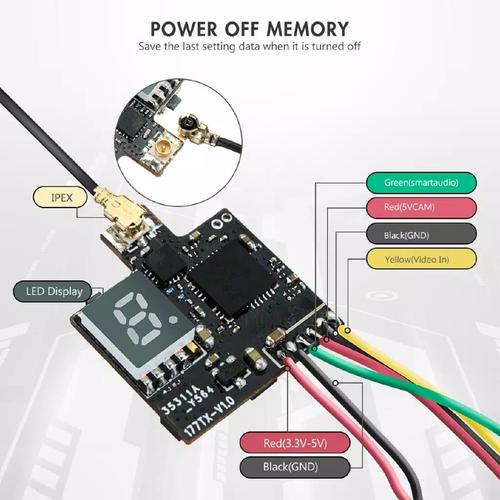
those feature only supported by VTX’s which support IRC Tramp Telemetry or TBS’s Smart Audio. (shown on the vtx board by Data/smartaudio pad/pin)
to enable this feature, you need to check first on your flight controller, look for a spare UART pin/pad, the pin we will use is T pin (TX Pin, you can choose 2/3/4/5/6 depending on your board feature)
Okay then, lets see, how to make our own VTX Table.
- You need to know first your VTX’s detailed specification (how many bands, channels, how many power levels).
let say, this is your VTX’s specification, it has:
– 3 bands (A, B, F)
– 8 Frequencies
– 3 Power Level (25mw, 50mw, 100mw) - Open your notepad, and start typing this command
vtxtable bands 3
vtxtable channels 8
vtxtable band 1 BOSCAM_A A FACTORY 5865 5845 5825 5805 5785 5765 5745 5725
vtxtable band 2 BOSCAM_B B FACTORY 5733 5752 5771 5790 5809 5828 5847 5866
vtxtable band 3 FATSHARK F FACTORY 5740 5760 5780 5800 5820 5840 5860 5880
vtxtable powerlevels 3
vtxtable powervalues 25 50 100
vtxtable powerlabels 25 50 100
Thats it, just save it and then keep it in your save folder.
Later in betaflight, do is as follows:
- Ensure what UART Pad will be used in your FC, after connecting all of the cable needed to the VTX
GND -> Negative pole in the quad/negative pole of the battery
V -> Positive pole in the quad/positive pole of the battery (please check and re-check, what is your VTX’s voltage capable of, some of VTX only accept 5V, others may accept to 25V (6S voltage)
Video in -> Video signal from the FPV Camera (if you want to use directly without FC), or the Video out from the Flight Controller)
Data/RC -> TX signal from Flight Controller’s TX’s UART - Connect your Battery to the quad (please check and re check that you already install the antenna on the VTX)
- Connect your USB cable to your Quad
- Open Betaflight Configurator
- Go to CLI Tab,
- Copy all of the script on the notepad/file that you have save earlier,
- Paste it on the text input on the CLI Tab.
- Press ‘enter’
- type ‘save’
- if you did it correctly, Betaflight configurator will back to the main page (page that shown when we open Betaflight Configurator for the first time)
- after you reconnect to your quad to Betaflight Configurator, just go to the Video Transmitter tab in Betaflight to check whether your setting already applied or not.


No responses yet